Completing Form 1583 and the notary process is a crucial step to officially activate your virtual business address. To make this as smooth as possible, keep this guide handy while you fill out the form.
Good news! We’ve already pre-filled most of the form with your LLC details to save you time and effort.
Prepare for Your Notary Session
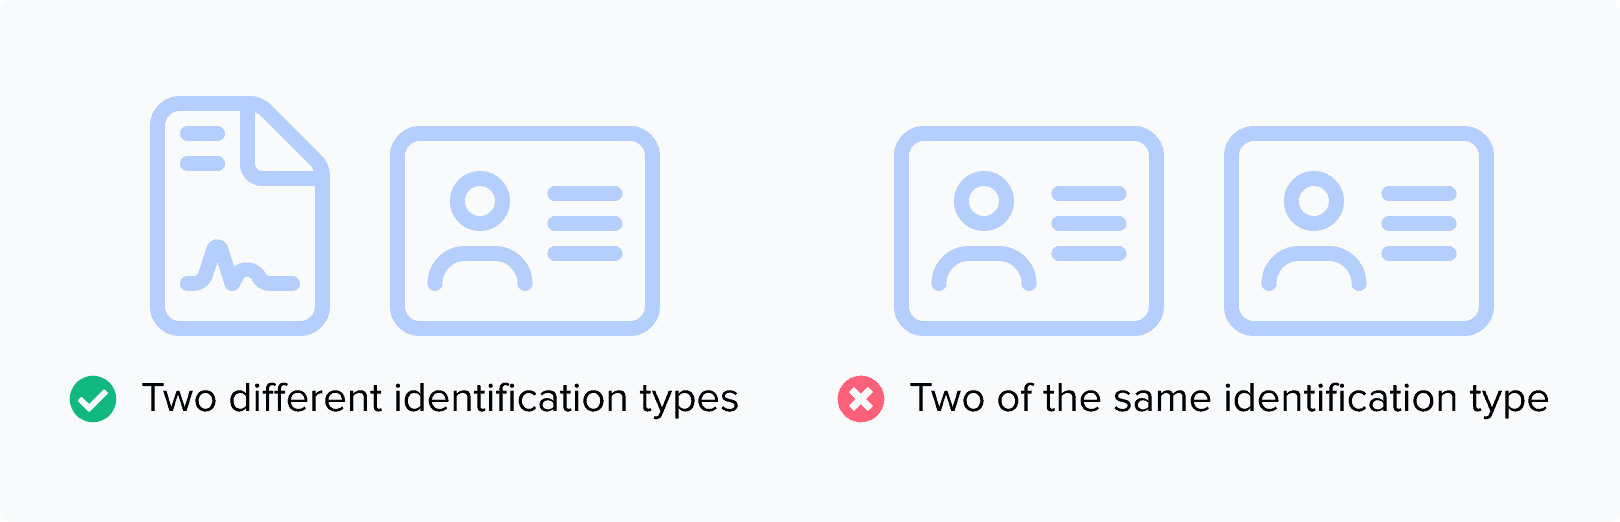
Before starting your notary session, make sure you have one of each type of identification:
Note: If your LLC has multiple signers (AKA owners), all signers must be present during the session and provide their own photo ID and proof of address.
1. Proof of address (choose one):
Voter card
Lease agreement
Mortgage or Deed of Trust
Home or vehicle insurance policy
Vehicle registration card
2. A valid photo ID (choose one):
Driver’s License
State ID card
Passport
Enter NotaryLive and Upload Your Documents
1. Go to NotaryLive and start the session.
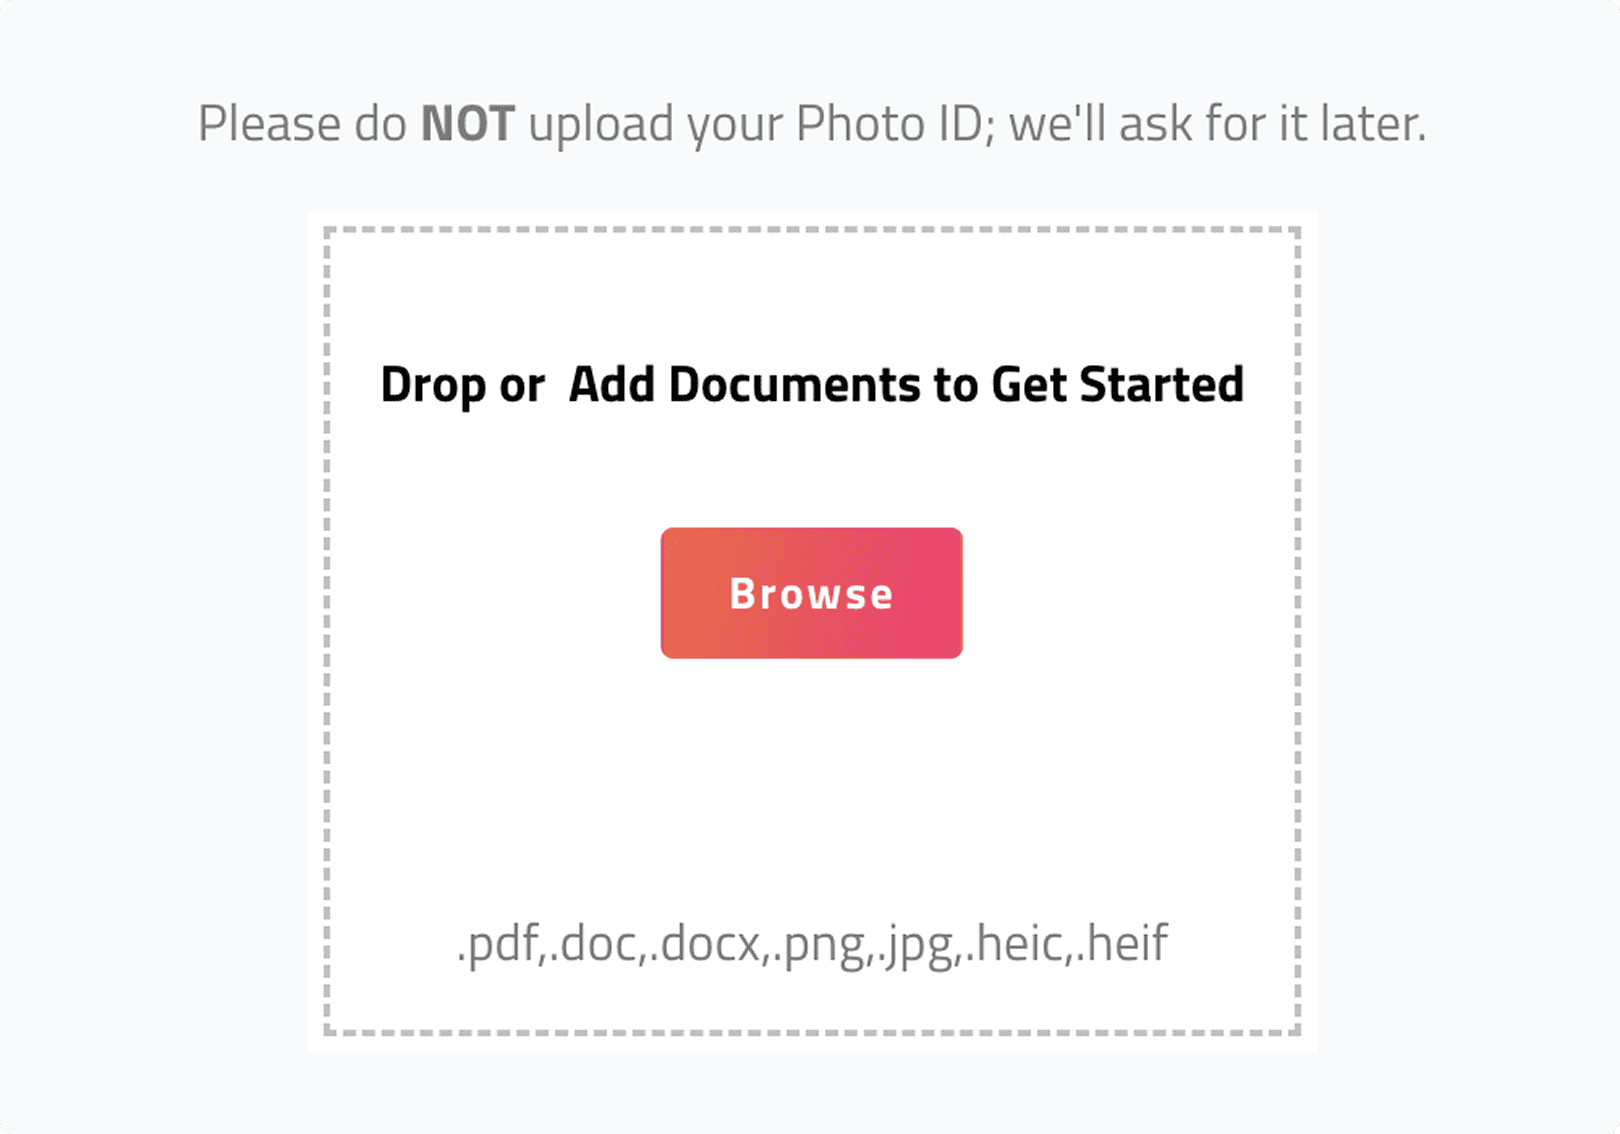
2. Upload your proof of address first (photo ID comes later).
Note: If there’s more than one signer - use the "Add More" option.
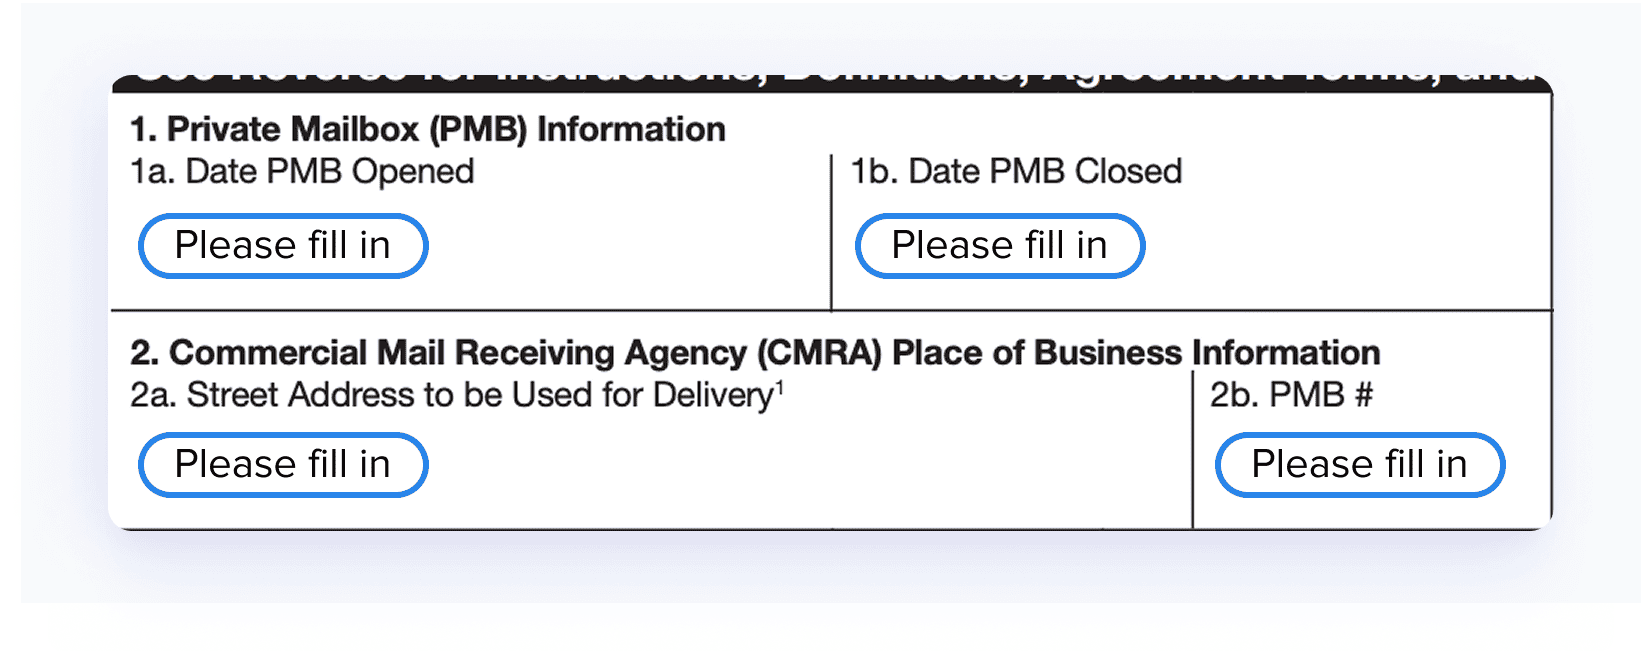
3. Each signer must review and sign Form 1583:
Do NOT edit the pre-filled sections. These details match your official LLC documents—changing them could cause issues with your notary process.
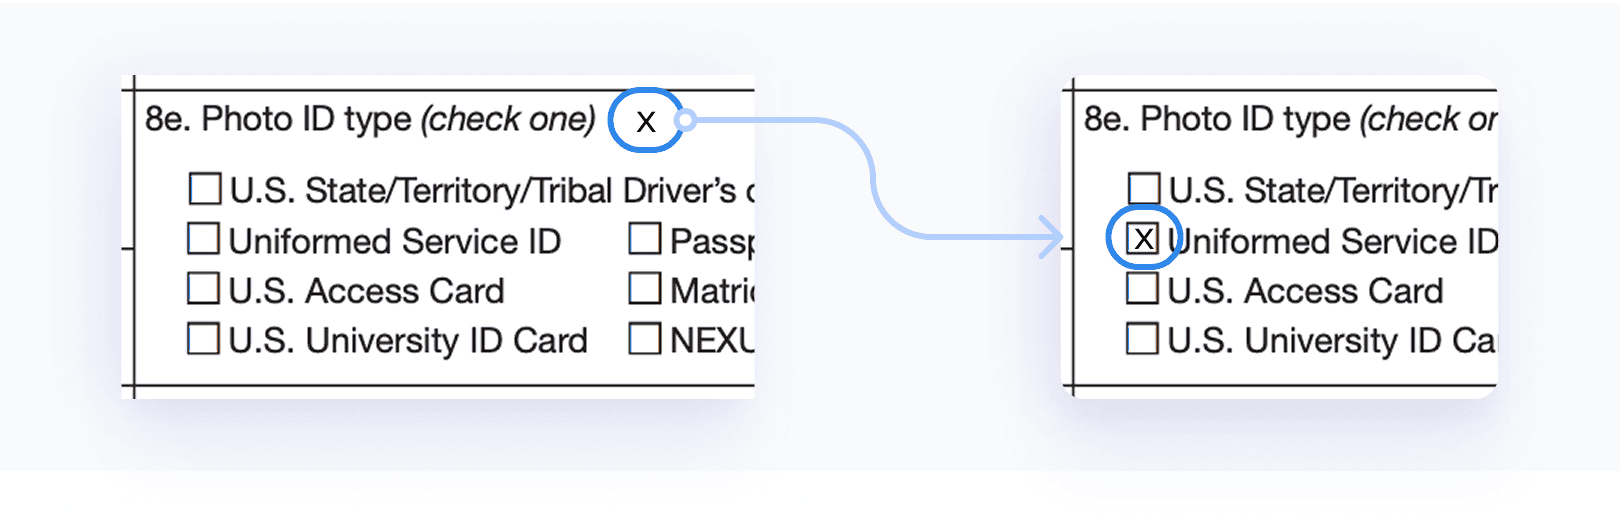
3.a. Which sections should you fill out? To keep things simple, we’ve added Please fill in indicators to highlight the fields you need to complete (see image below).
3.b. When you see an “X”: Click and drag it to your chosen answer.
3.c. Spotted a blank field without any indicator? Not to worry! The notary will handle those.
Identity Verification Steps
To proceed with the notary session, you’ll need to:
Note: If your LLC has multiple signers (AKA owners), all signers must be present during the session and provide their own photo ID and proof of address.
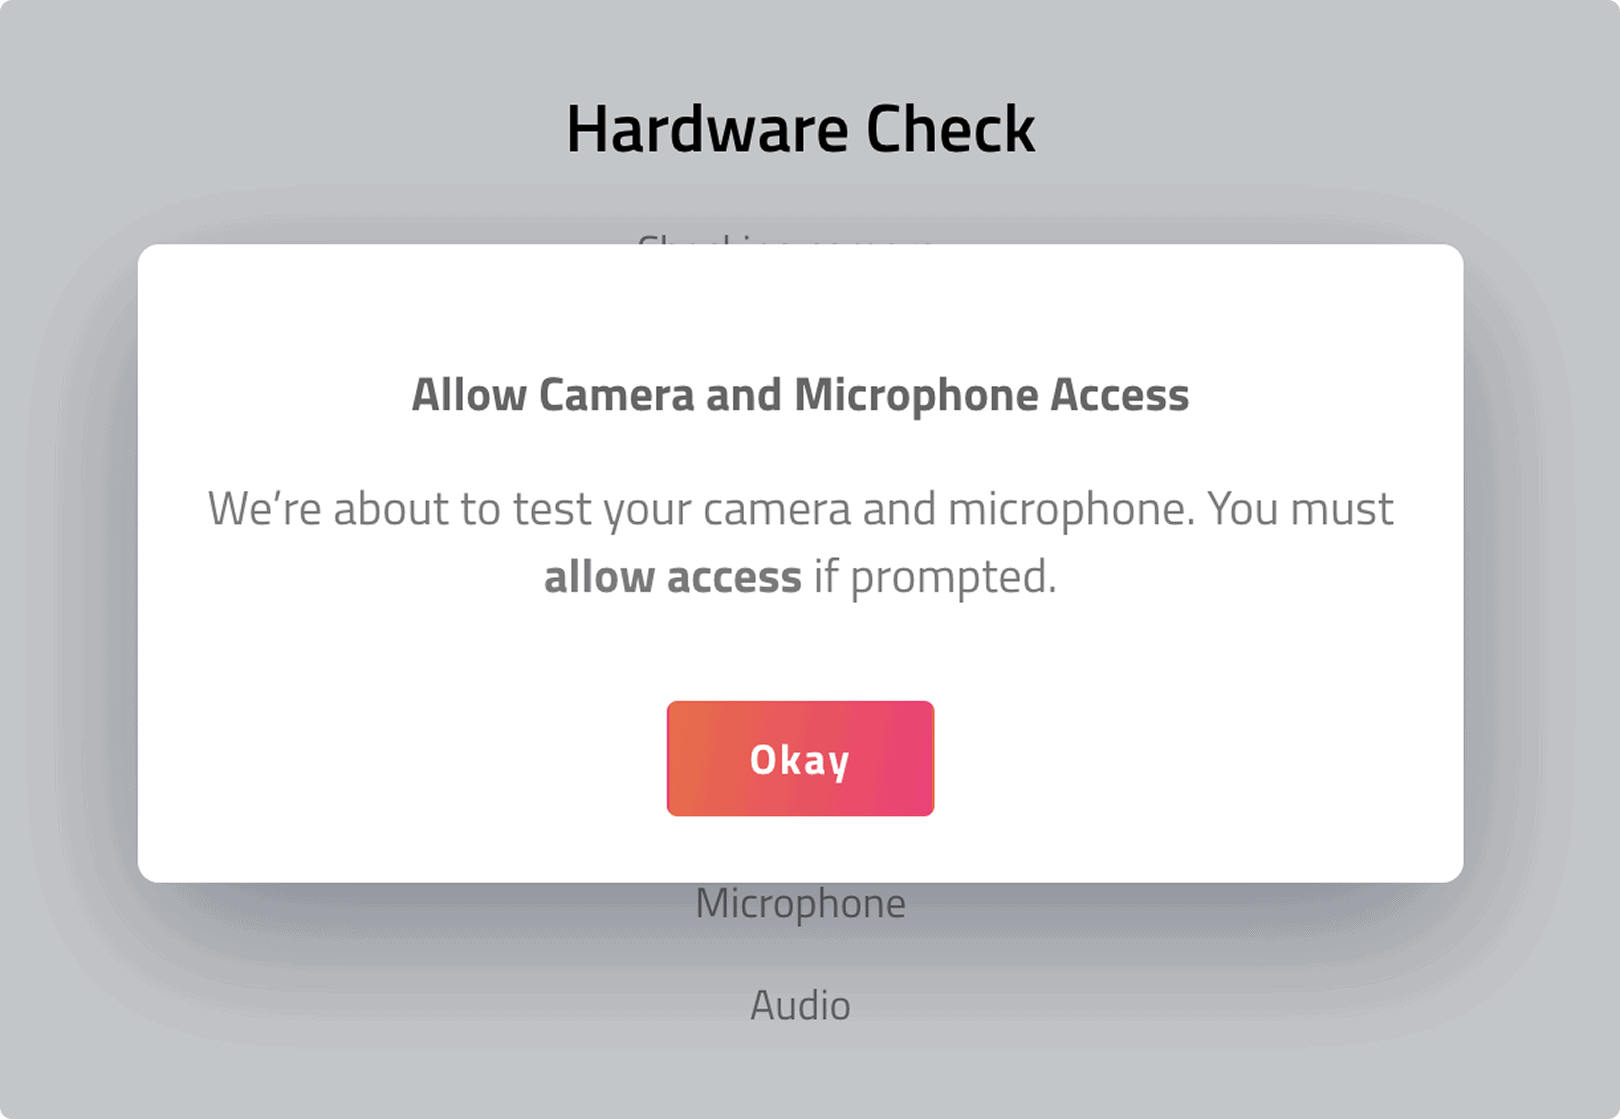
1. Approve camera and microphone access for the online call.
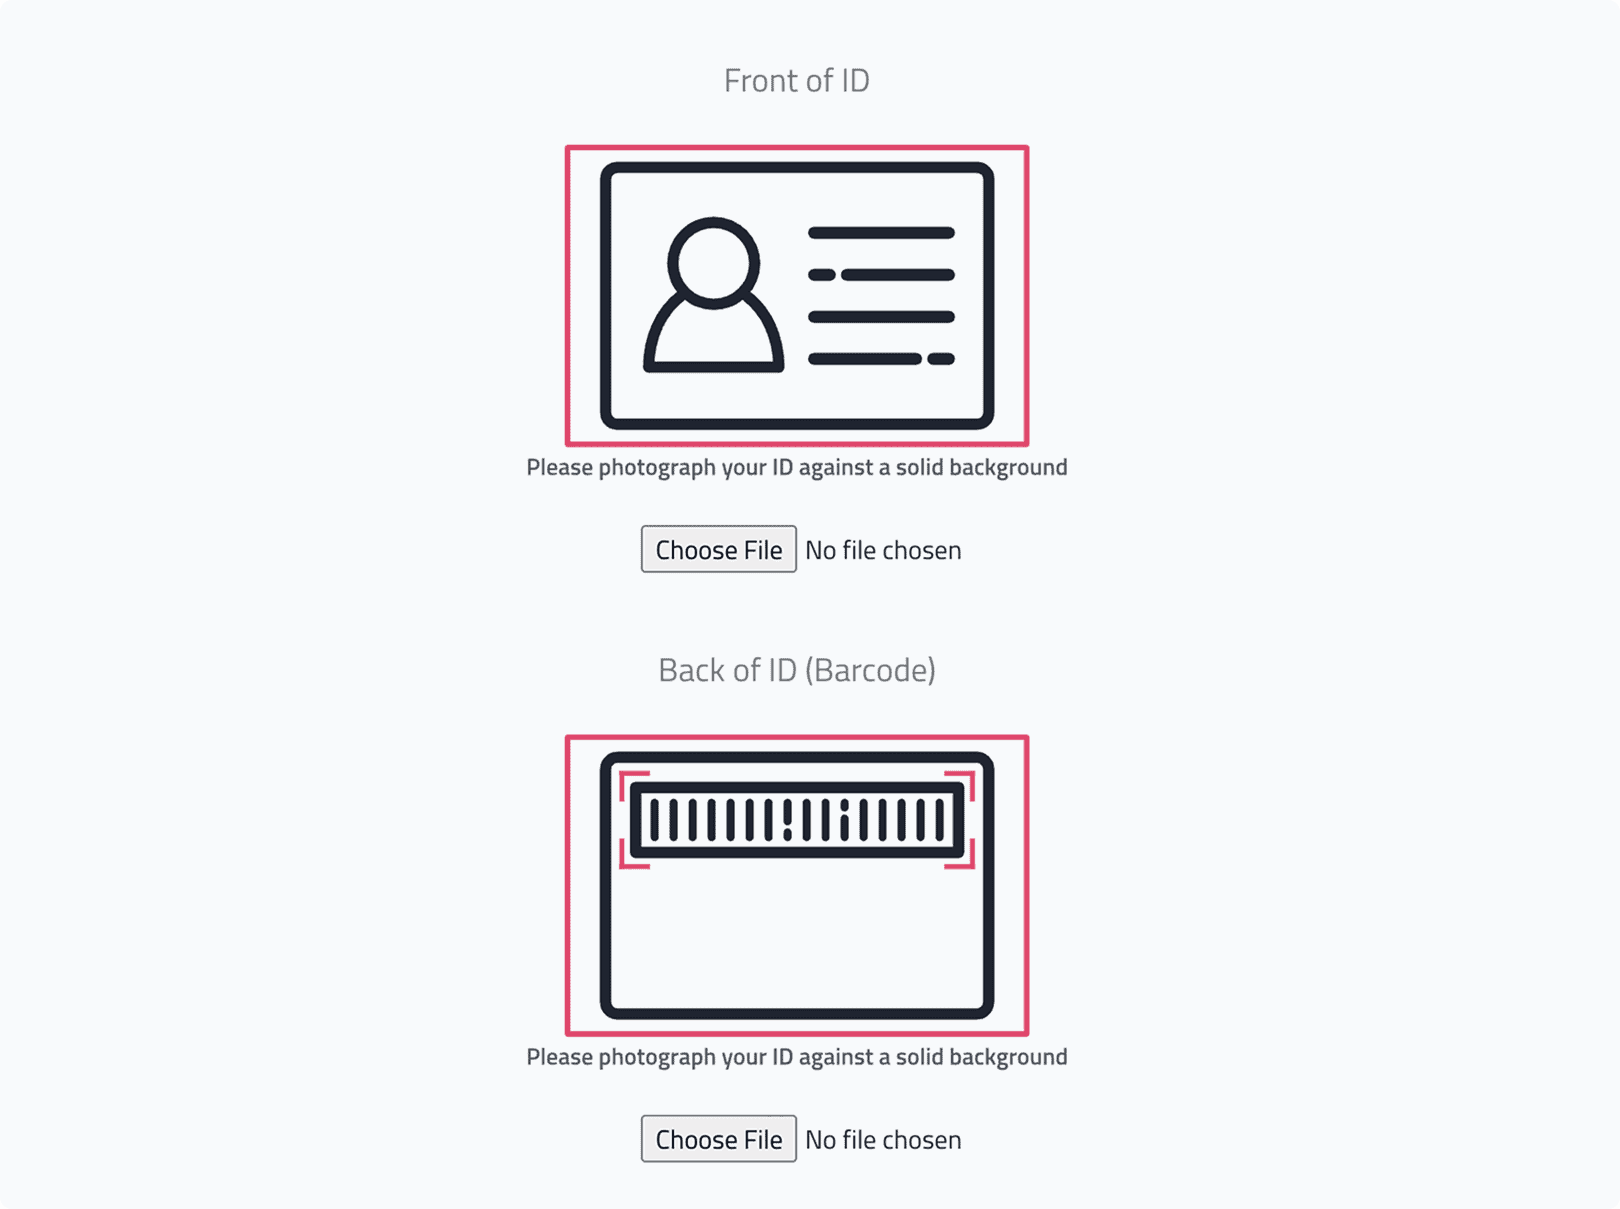
2. Verify your ID:
Upload your photo ID.
Wait for verification.
3. Pass a security check: Answer a few knowledge-based questions to confirm your identity.
Connect with the Notary
Once you’ve passed the verification, you’ll be connected with a live notary who will:
1. Review your documents 2. Sign the form with you 3. Complete the notarization process
That’s it!
After a final notary review, your virtual mailbox will be activated, and you will start receiving business mail.